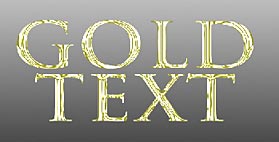
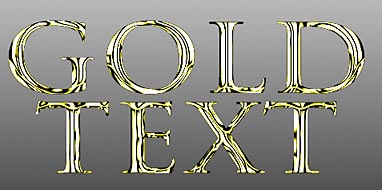
Quick Gold Text
In this tutorial I'm going to show you a quick way to create some gold text using pretty much any kind of font you like. I find this technique usually works well on medium sized fonts that aren't too thick, and aren't too thin. So let's begin.
Step 1
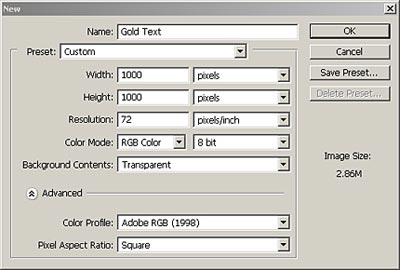
Open a new RGB image that is 1000 x 1000 pixels wide at 72ppi, with a transparent background.
Step 2
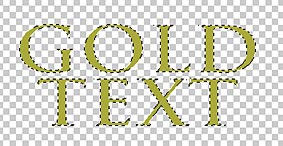
Use the "Horizontal Type Mask Tool" to create a text mask for your words. Make sure the font is set to be around 200 points. I used "Trajan Pro" here, however, you can use other fonts, such as "Onyx" or "Script". Just don't use a font which is too thin, or a font too thick.
Step 3
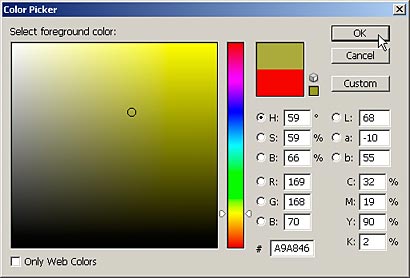
Starting out from the default black foreground and white background, change your foreground color to the following: Red: 169 Green: 168 Blue: 70. Then go into Edit -> Fill, and fill it with this foreground color.
Step 4
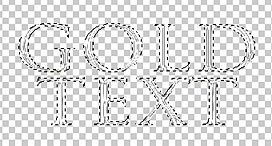
Duplicate the Layer and with the Selection still active, go into Filter -> Sketch -> Chrome, and use the following settings: Detail: 10, Smoothness: 10
Step 5
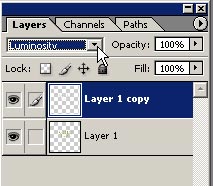
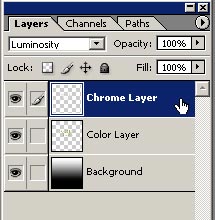
Change the chrome layer's "Blend Mode" to Luminosity.
Step 6
Create a Background layer, and create a white/black background that goes from the top of the image to the bottom using a white/black gradient.
Step 7
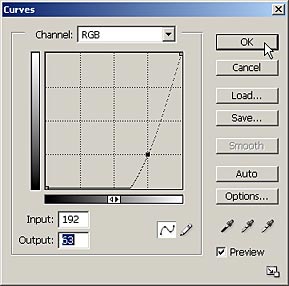
Now go back to the top layer, select it, and add a Curve adjustment layer (Layer -> New adjustment layer -> Curves) to the top of the layer stack and Apply the curve adjustment with a single point: Input: 192; Output: 63
Step 8
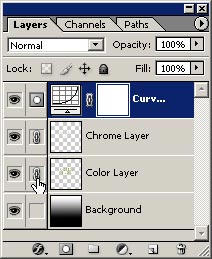
Merge the top three layers. To do this, link all three top layers (shown below), and then go to Layer -> Merge Linked.
Step 9
Re-select the newly merged text layer, and go to Filter -> Blur -> Gaussian Blur, and enter a radius of .4 - .5 (approximately — this is a matter of personal taste).
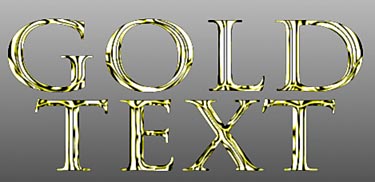
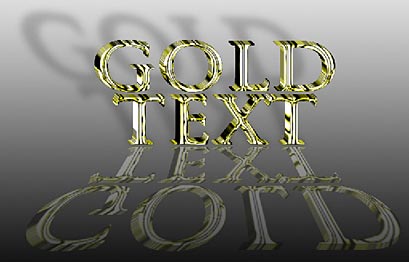
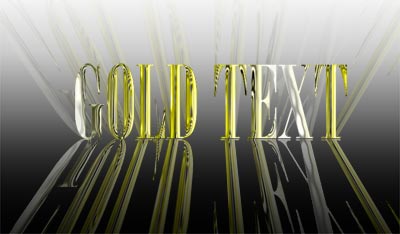
Here are a few variations I came up with while working on this tutorial. To create the 3-D look, do the following: Select the move tool, hold both your Alt+Shift keys down while you alternate between shifting right and shifting down with your arrow keys. Do this about 5-15 times and you have an instant 3-D look. Just make sure you merge all the layers together afterward, as each nudge with the arrow tool creates a new layer.